Tuesday, April 26, 2011

easy pillow covers tute


I had this fabric for quite some time but some how it was away from my sight so i forgot about it , yesterday i found it in a cupboard and was totally in love with the print once again and i remembered how this fabric caught my attention in the fabric store all of the sudden and i bought enough to make a bed sheet with pillow covers,


pillow covers are really easy to make
for example the length of your pillow is 20inches then that's how you will cut the fabric
double the length of your pillow and add extra 5to7 inches and width of the fabric will be kept enough to occupy pillow inside the cover easily .


now with the wrong side up fold your fabric in double, measuring it to fit your pillow(20inches) leaving the extra 7 inches on one side


now fold the extra 7inches over your double folded fabric and pin up


now stitch the sides turn the pillow cover inside out and slid in your pillow and that's it all done !


the 7 inch fold you created would automatically go inside and it will help to stop your pillow from slipping out of your cover if you want you may also add a titch button in the middle of the opening

sweet dreams :)
.

Thursday, April 21, 2011

The Winner of the Bead Bracelet

OK guys today is the the day to annouce the winner of the bead bracelet giveaway ,i have used an online randome number generater to draw the lucky winner .
hears the image of the result


and the winner is Monique of Naturally me creations ,Congratulations monique :)
The winner is requested to conatct me at the email artscraftsnhobbies@yahoo.com and send me her home address, if the winner does not conatact me for 5 days then i will draw another name + i would also like to thank every one else who took part in my simple little give away :) .

the bracelet has been claimed and shipped to the winner

Tuesday, April 19, 2011

Big day Tomorrow

Good day friends ! hows life, sorry for being so ignorent about posting but life was pretty bussy for me in the past 15 days any how tommorow is the big day for the participants of my give away of hand woven glass bead wrist band/bracelet (spring theme)so stay tunned for the results tommorrow i will accept entries till 12am today on 20th April


BEST OF LUCK :)

Tuesday, April 5, 2011

free hand pot painting


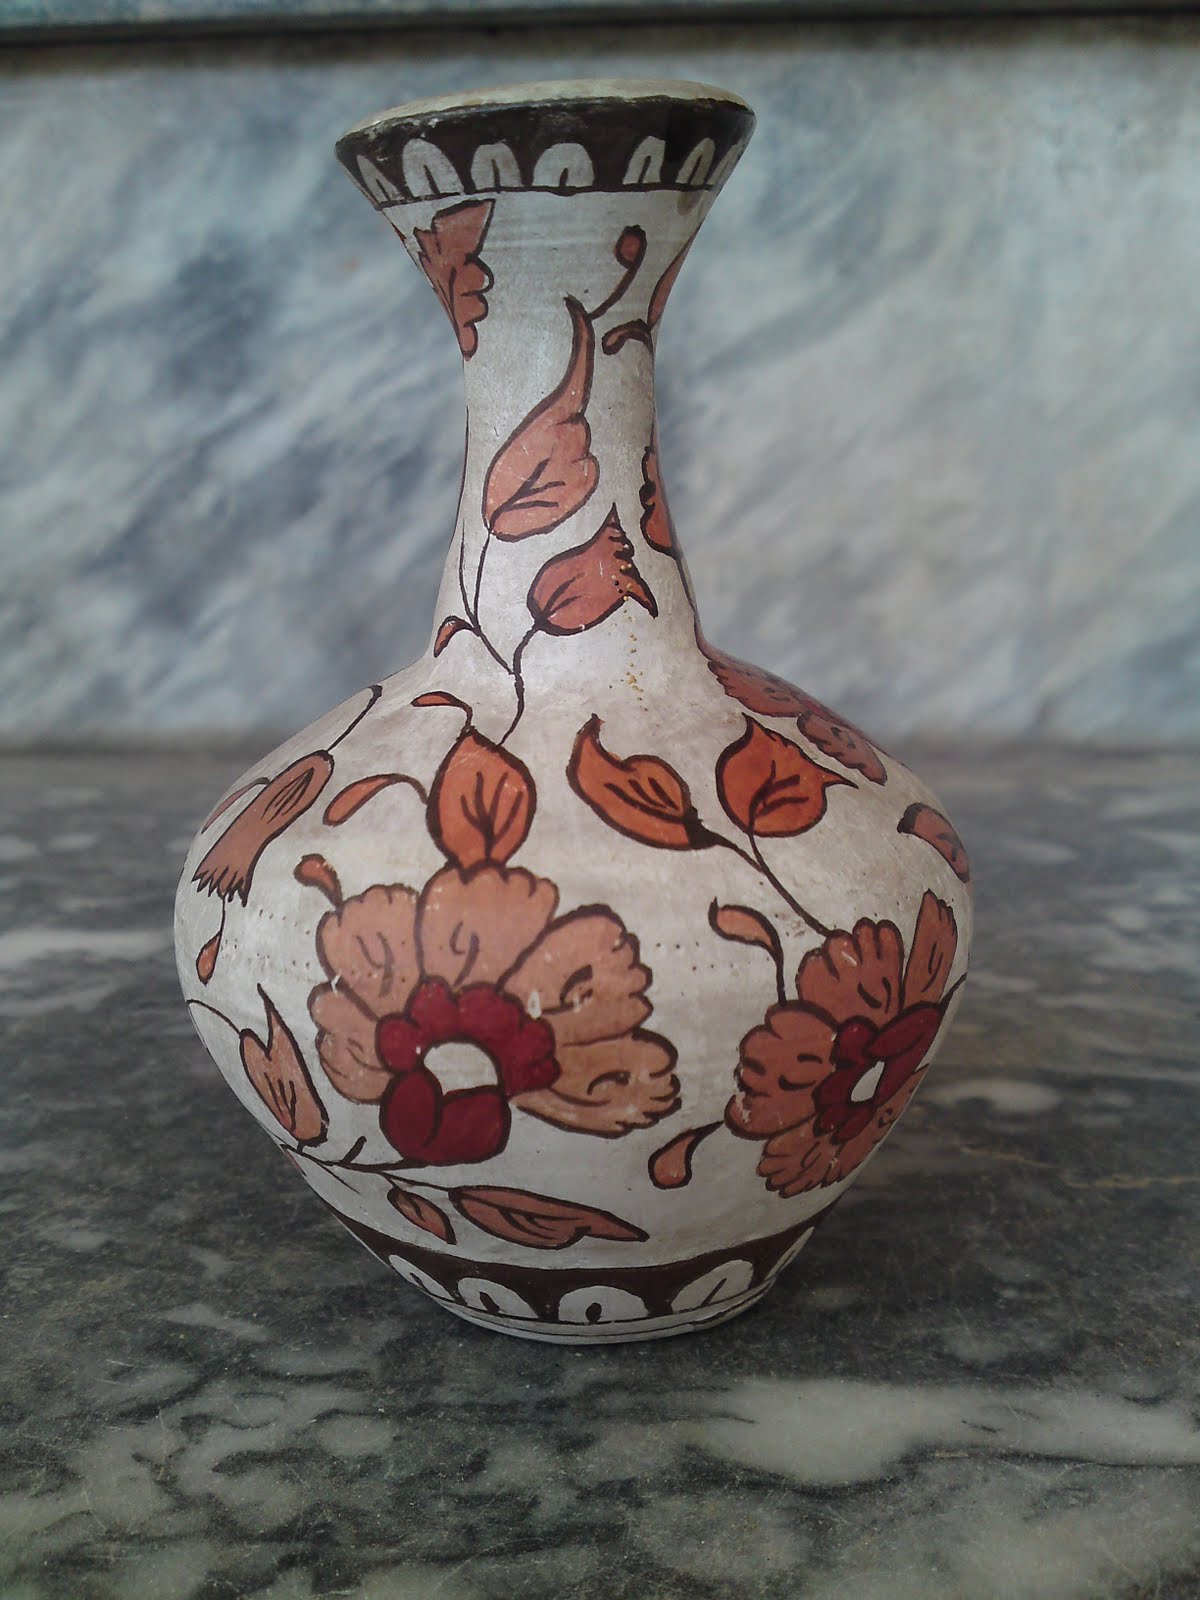
I painted this little terracotta pot some 15 years ago :) yup it will soon be a vintage item now ! i was studding back then and pot painting became my hobby for a while .This vase is one of many pots that i painted and it still is with me :) rest of them were given to friends and relatives as gifts, if i saw them ever i will definitely share them with you all


I drew a free hand floral design with a pencil and then painted it with simple poster paints ! shades of brown are used with a out line of darker tone ,the out line is drawn with a zero size brush .The mistake i committed was that i never coated it with clear varnish because of which the white back ground developed a bit shabby look over the time, which as a matter of fact i like now :) again a mistake that turned out great (the regular readers of my blog will under stand what i am talking about for the newbies click hear)


a bit more detailed look of the floral design and my camera just could not bare the beauty so it took a blurred pic :(

by the way now i have sprayed it with clear lacquer spray to save the shabby look from turning into a dirty look :)

Sunday, March 20, 2011

100 followers Give Away

On the happy event (for me ) :) of finally having hundred followers i decided to arrange a simple give away ,OK first show you what you might win


its a hand crafted wrist band made with bright multicoloured seed beads ,elastic thread is used for weaving the beads so it will fit any wrist size easily and its really very comfortable to use it will not entangle in your clothes and you will hardly feel that you are wearing some thing on your wrist

RULES TO ENTER THE GIVE AWAY
  • become a follower of the blog
  • if you already are a follower then .... its great (just let me know by a comment)
  • leave a comment bellow ,that i love so much to read :) .
  • the give away ends on 2oth April and the winner name will be posted on 21st April.
  • i will be using the online number generator to pick the winner.
  • any one from any where can enter i will post to any destination.
lastly please help me advertise this give away in any way put the picture on your side bar ,blog about it tell your friends by email or personally in any way .
BEST OF LUCK :)


linking to
making Monday marvelous
its a blog party
craft o manic link party
motivate me monday#62
i made this tuesday#19
linky party no 47 by tea rose home
Sunday linky party no.8

Saturday, March 19, 2011

Wooo Hoooo I am the winner

Remember my post about the blog candy Give away hosted by Theresa on the occasion of her birthday ,,,,,, so i am one of the five lucky winners i am soooo happy as this would be my first ever wining give away ,thank you Theresa :)

oh ,oh i totally forgot to tell you what i will be receiving


yup thats right soo many goodies in one pack ! lucky me :)

Theresa would draw two more names for some more goodies once she has hundred followers
so why dont you enter too :) best of luck , down is the link to her post
http://craftsfriendsangels.blogspot.com/2011/03/blog-candy-winners.html

Thursday, March 10, 2011

A quick stationary case for my girl

Hi to all ! today i am not posting a tutorial !just wanted to share a few glimpses of a new very quick and simple stationary case i made for my daughter as a reinforcement gift.
As i have mentioned earlier she is going through her final exams and all the mothers know it very well how difficult it is to keep your child seated for a long time so that she can revise her work..... No doubt its a challenge......... so this idea popped into my head...... that insted of sweets or games for reinforcement i should make her something she can use every day but the problem is that i am not very speedy in stitching and i absolutely have no time left for such activities now a days as i have to take care of the house family pets my younger daughter and then there comes the studies of the elder one so i managed to slip a few moments to make this quick pencil case for her.

she selected the fabric her self out of my collection and she asked to add some cristals to it so i hot glued these folower sequeces to it .

i know its a very ordinary looking thing but so long as the receiver likes it ,it serves the purpose of being a good reinforcement :) so I am happy with the out come.


Hoo are you part 35
who made what weekend party #13

Wednesday, March 2, 2011

No Sew check book cover TUTE


There are days when you really need to sew some thing but just dont get the hang of it and for some reason you dont want to sit and bound your self in the territory of your SOWING MACHINE ,in those rebellious days NO sew projects rock :)............. what do you say ?
No sew is also soooo good for those who dont know or dont like to sew .
I really needed a check book cover but just couldn't find the time for it as my elder daughter is going to have her final exams in 6 days and i am really busy in helping her to prepare any way coming back to the real thing today i just need 15 minutes of all those people who need a check book cover but dont want to stitch it :)

The stuff you will be needing
  • formic seat or felt
  • scissors
  • transparent adhesive
  • pencil and foot
thats it


First off all you will need some measurements to cut out formic seat

measure the length of your check book mine was =8inches +1 inch =9inches
width ,mine was =4 inches x 4=16inches

so we will cut a piece of 9 inch width and 16 inch length (good for my check book) as you can see in the above picture.


fold the sheet in half to find out the mid line now apply adhesive to the lower edges fold and apply pressure with your hands for some time so that the bond is strong after both of the sides are done your cover should look some thing like this .


Now fold it in half and trim the edges with fancy scissors this step is optional you may omit it .


now comes the fun part decorating you may stick some lace or beads or sequences but i opted for a simpler thing :) i drew some free hand borders with a permanent marker ,


The last step is to cover your folded or closed check book cover with a cotton cloth and iron it on medium heat and then immediately place it under a heavy book and leave it there for a while this step will help to maintain its shape and creases.


Your brand new cover is ready to store in all of your check books .enjoy.


linking to
tea rose home linky party #44
hand made Tuesday by lady bug blessings
who made what weekend party#12 by naturally me creations
Friday favs party #1by nap time crafters

LinkWithin

Related Posts with Thumbnails