Monday, February 20, 2012

plastic bottle gift pack (another idea)


Good day friends hows life ,spring is about to come and this has placed me so much into recycling mode as you will notice from my posts to come :)
Today i will share a simple idea on how to use the base of an empty plastic bottle as a gift pack for any occation like bithdays or as party favours ,use any goodies to fill ,sweets ,stationary items for kids or some small toys .


That's the stuff you will be needing
  • an empty plastic bottle (i am using a small size bottle)
  • paper knife
  • beaded rubber band
  • scrappy piece of cloth( cut out a circle big enough to cover the top of your bottle)
  • a piece of scrape book paper


remove the label from the bottle and cut from some where in the mid of the bottle.


Now slightly melt the sides of the rim using a candle flame to avoid sharp edges,

cut a rubber band from one side and thread some colorful beads in it and then tie it off to make a beaded stretchy band to seal your gift pack.


That's it you have done your difficult part now is the fun part! just add in your goodies cover it with your fabric circle and place the beaded rubber band on it.I have also added a small paper circle on top with a birthday massage for a more interesting look ! but its optional .


Hummmm.... when talking about recycling ,dont you think it would be such a waste to through away the top part of the bottle ! Um ..... No there is a very clever use for that too :) Use it as a Kiev or funnel to fill in stuff to the bottles/containers you use in your home .......Or .....Yup there is another very interesting use for this part but i will share that with you all in my next post .....Till then SUSPENSE :)

Take care .....and see you soon

Linking to
Friday fun party

and to these parties

Sunday, February 5, 2012

Upcycled Soda bottle dessert packs


Happy Eid Milad-un-Nabi every one (the birth day of our beloved and last Prophet Muhammad P.B.U.H according to the lunar calender).
In Pakistan its a common practice to make or buy sweets to share with the neighbors ,friend and family on such special religious occasions .Usually people take these goodies to others either in some platters or dishes they own or in market bought disposable containers but both have some draw backs the Platters and dishes has to be returned so the receiver has to go through the trouble of emptying and washing them before returning and the disposable containers don't have to be returned but hear in Pakistan their rates are considerably high so to avoid these problems why not we up-cycle some thing that we all have in abundance and they usually end up in our trash cans YES you got me right i am talking about empty soda Bottles!

HOW TO


to make these you need 1.5 litter or 2.25 litter soda bottles remove the label and cut them app 3 inch below the the mid line .you can easily cut these with precision knives or scissors,


now cut the rim 6 times horizontally making six equal flaps (roughly 4 to 5 inches deep) be-careful with the depth of the cuts they all should be equal.


now at this stage fill up your container slightly below the lower edge of your flaps I am using the semolina desert in them (recipe available here) ,now comes the fun part start to fold the flaps inwards and create a crease by pressing it hard with your fingers


continue to do that with every next flap


in the end you will end up with a hexagon on the top of your container add some embellishment on the top like a ribbon Bow or some fabric flower ,over here i am using 3 different types of tissue paper roses is peach and light purple colour ....the camera is not doing justice with the colours in the indoor lights:(


That's it your up cycled soda bottle containers are all ready to be presented to your dear ones , so for the next time plan ahead and save some soda bottles for an occasion ,these would work great for the Birthday Party favors too :) .enjoy


Linking to these parties


Friday, December 16, 2011

Empty Olive Oil Bottle Decore Tutorial


Good day friends ,hows life ,pretty busy routine for me as you all must have noticed by now by the little amount of posts i write :) .Today i wanna share a project of mine with you that i completed some 4 Weeks ago but never had the time to compile the pictures together and give it a form of a tutorial and blogger is totally in mood of playing games with me i am writing the whole post for the 2nd time :( although it was getting auto saved but even then every thing just vanished and only the first paragraph was left ARRRGGGGGG I HATE THAT :( ...any how whats done is done so lets take a deep breath let the anger flow out of me ! and i feel better :)...


OK
lets tell you what are we going to need for this project


  • empty olive oil bottle or any other glass bottle
  • German white glue
  • jute cord
  • Round glass balls
  • and last but not least transparent water crystals


first of all thoroughly wash and dry your bottle , then put a generous amount of white glue on the neck of the bottle and on the middle front make two glue circles ,i am doing that on the engraved glass label in order to hide it .


OK now start rolling your jute cord on the neck of the bottle until fully covered and then cut off the access


now make two spirals about 1.5 inch wide and place them on the glue circles

now leave the bottle for 2 hours so that every thing settles down a bit ,


after this time rub some more white German glue on the cord with your fingers ,this step will not only make your just decoration more durable but it will also add a beautiful shine to it when it get completely dry and don't worry about the white appearance of wet glue as it will get transparent when it dries off completely also add the glass balls to the center of the spirals and leave to dry ,it will take about 1 to 2 days to get completely dry so be patient :)

Now comes the fun part that is adding water crystals these are easily available in decoration shops just add the tiny balls to water in a wide container leave over night and they will swell up almost triple their original size by absorbing water ,just fill up your bottle with these transparent crystals .These crystals will need to be soaked in water every fort night but i have experienced that if you put them in a narrow neck container like this olive oil bottle they don't need soaking even for the whole month .


thats it friends i hope you like this project


related projects


Linking to these parties (click here)

Tuesday, November 22, 2011

Kanzashi flower head band


hi friends today i am going to share my latest creation with you ! a bright orange Kanzashi flower fixed on off white double bow


The center of a flower is a simple button with a pearl glued in the center the button is both glued and hand stitched with the flower and bow for extra durability


thats the back part ,since the ribbon wrapped plastic head band is quiet thin and delicate to provide a wide base to settle the flower on ,i used an extra trim of the same ribbon at the base for support .The open edges of the ribbon is heat treated to avoid fraying .
hope you like it :)

Monday, October 31, 2011

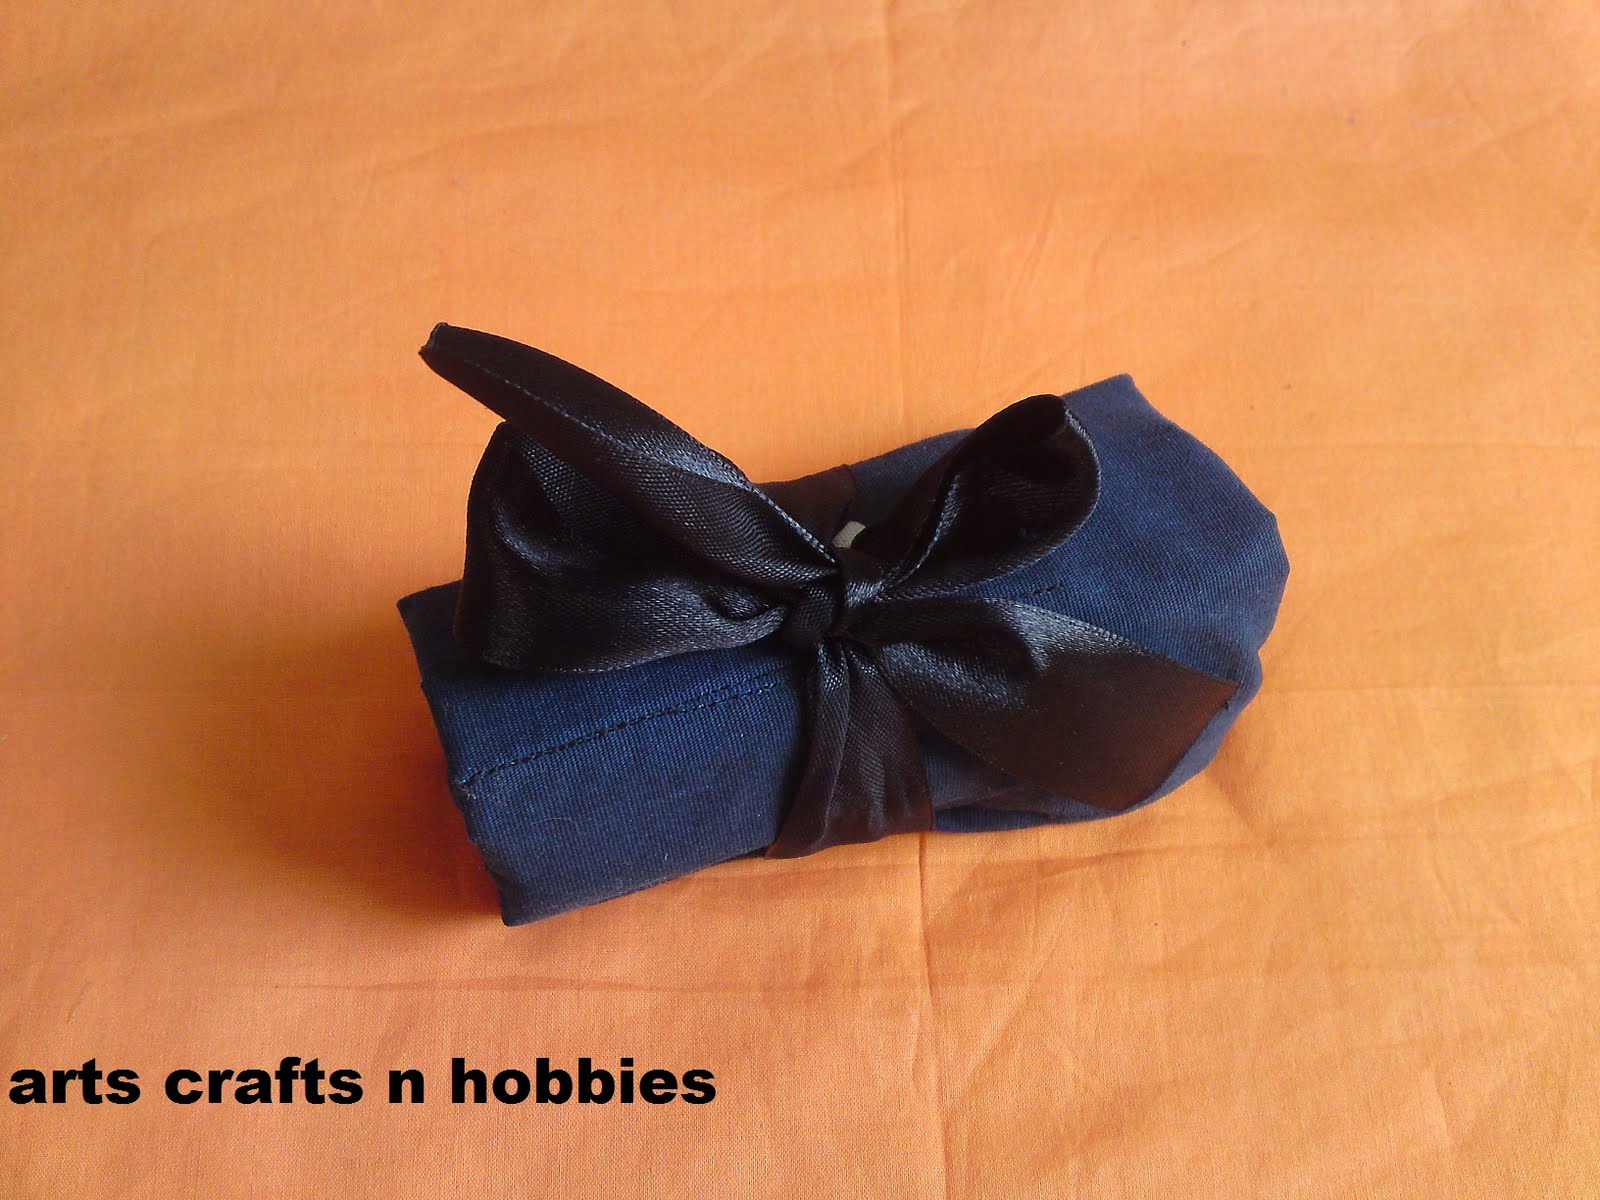
Manicure roll in fabric


Hi friends hows life ,today i wanted to share some thing that we have already talked about in quite detail a while ago but today it has a brand new purpose,how many of you (like me) notice a cut in the cuticles (out side your home) but can't do much about it since you don't have the proper equipment to handle the problem ,or a small crack on the side of your nail that can be easily stopped from extending and breaking the whole nail apart but ! again ,don't have a nail cutter ready with you while sitting and waiting in the car , or when you have some free time in some gathering ,when you are not the focus of attention !


keeping all this in mind i designed a small fabric roll for the essential manicure tools that can be folded in a Small cylinder and you can easily store it in your hand bag and take care of your hands and nails when ever you are free, i love the way it turned out, every thing has its own pocket keeping every thing in place


wanna make one your self? :)
click this tutorial of mine ,it takes hardly an hour to finish and make your life easy and your hands will love you for this effort.

Sunday, October 2, 2011

10 minutes flat Sandle's Revamp


Good day friends ,hows life , i am so angry on my self for not being able to be a good and regular blogger ,may be my Gall bladder(removed by surgery)has taken away my punctuality with it :) but the good news is that the creativity inside me is still very much alive so we have HOPE! :)
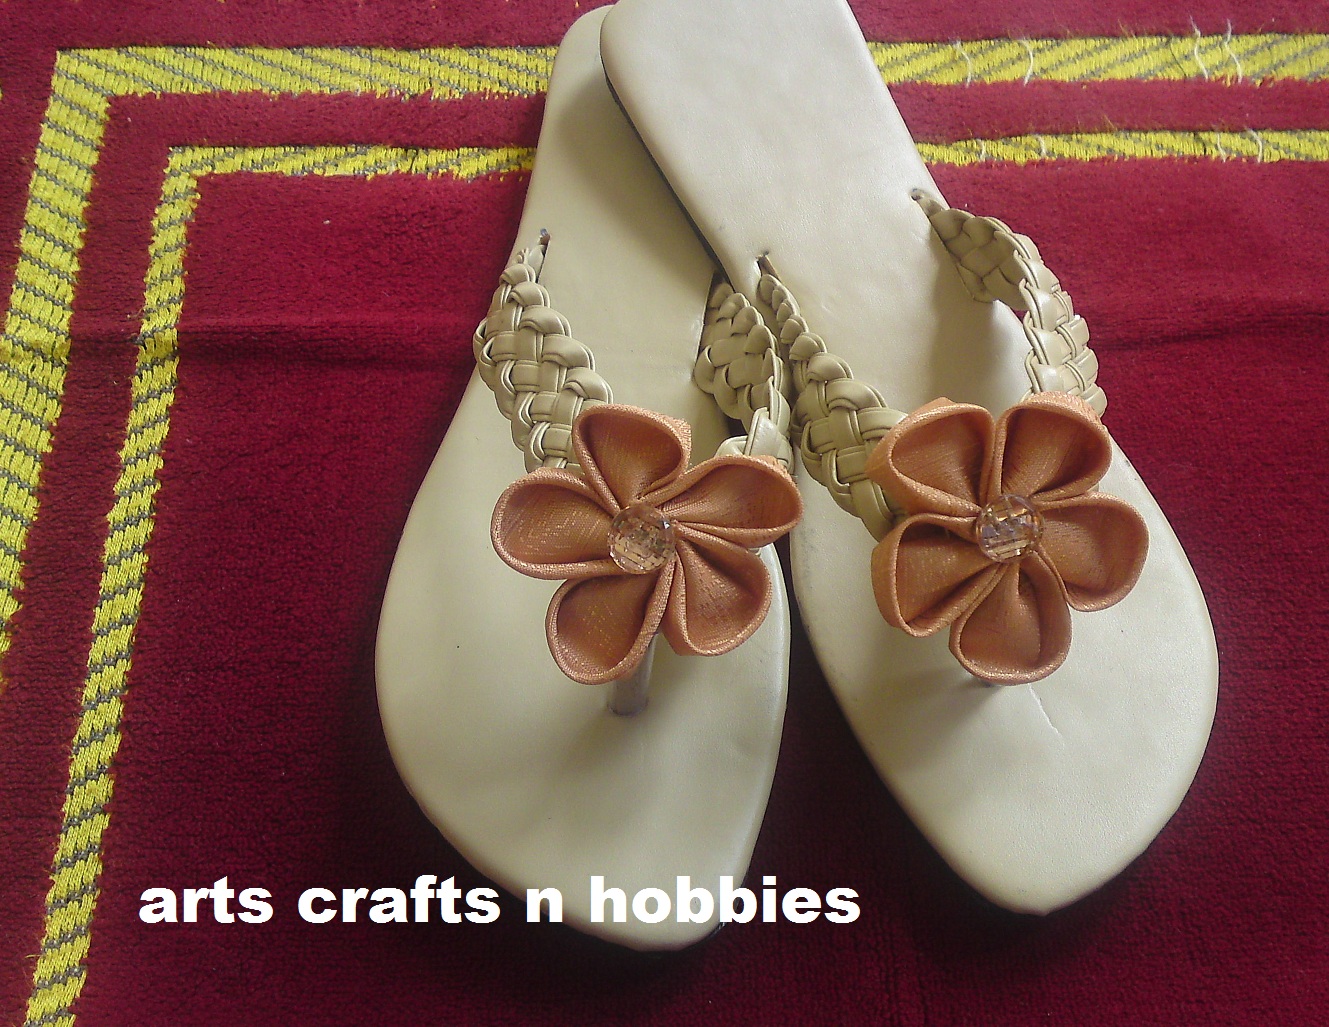
ok enough beating about the bush lets get back to business a few days back i was enjoying the shopping trip with my elder sis and found some really cool woven flat sandals and they were at a quite reasonable price with lots of potential in them .


So with out secont thought i brought them home and decided to embellish them with simple Kanzashi flowers which i once learned from a Korean friend of mine Miss .Enjang Park .I still miss her at times such a sweet girl :).


I selected this slightly stiff peach color silk fabric and created the two beauties ,its slightly difficult to work with silk in flower making but its worth the shiny look ,for the center i used these fancy peach color buttons which i already had since a long time waiting in my craft box to beautify some thing and yesterday was their big day.


the straps are wide enough so they gave me sufficient area to settle the flowers on them in center with the help of hot glue ,and TADAAAAAA all done some really trendy looking flats are waiting to be worn :) hope you like this simple revamp .

Friday, September 16, 2011

Back to my blog after the surgery :)

Hello dear readers! i know, i know, some of you must be angry on my long absence and some would have forgoten about "arts crafts n Hobbies",but still i am thank full to all of you that you stayed and waited with patience so for the friends like you all deserve some explanation and may be a glimpse to what happened ok lets start i have never mentioned these things on my blog before as its a craft related blog so i always considered the matters related to my SELF as un relevent ,any how guys i had gall stones (stones in my Gall blader) quite some time ago well 4 years to be more exact but they got diagnosed a few months back ,the impared functioning of my gall bladder was causing reapeated ulcers in my stomac also known as (Peptic ulcers)which are very pain full and now when the stones were discoverd in an ultasound i was suggected to surgically remove my gallbladder which was causing my repeated episodes of extreme pain ,so friends here's the news guys i have had my surgery and i am back almost recovered last few days were quite pain full but now things are getting back to normal :) so no more absence from my blog now :) ,this post was just to thank you all to bear the absence with me .

Thursday, August 18, 2011

YOYO Embellished Head band tute


My kids have recently started using head bands instead of pony tails so i made some cute head bands for them i will share them one by one with you all.
Today i will share the maroon and white one which i made to go with a cute dress that my little one has .


the things you will need
  • 1 large YOYO in maroon velvet
  • 1 smaller yoyo in white silk
  • two scrappy strips of white net
  • a vintage button
  • needle and thread
  • transparent glue or glue gun
  • black plastic head band

How to make a yoyo tutorial (in case you dont know how to make one already click on this link)


its pretty simple just stitch the white yoyo on top of the velvet one


add the button in the middle


sew running stitch along one side of the net strips ,pull and secure thread before breaking it off.


stitch the two net fan like shapes at the back of the maroon yoyo and stick this whole thing with the head band thats it friends all done :) hope you like it .a perfect match for the dress ! see how happy she is MahsaAllah:)


linking to
Sunday scoop link to party
Sunday showcase party w/clean mama

Sunday linky party no.29

LinkWithin

Related Posts with Thumbnails