Hi friends today i will share one of my fresh inspired creation that is my favorite so far and the amount of convenience it provides me is so so so great.

A 24 pockets changeable HAND BAG organizer (12 pockets outside and 12 inside with a large opening in the middle)

once you have done all the stuffing just pick it up and place it in side your hand bag.
OK first thing is first i have to give the credit to whom i got this idea from
The Kangaroo keeperI saw this advertisement in one of the blogs
(planet Weidknecht) i am following and i was totally mad to see this and wanted it so bad and its not very expensive either but i live in pakistan and its a long procedure to buy online stuff here:( any how here's my version and i name it the
instant bag organizer :)
hope you like it and its not difficult at all
things you need- 1 yard fabric will be enough
- scissors
- sewing machine
- heavy duty machine needles

OK now to make a large instant organizer cut the fabric according to the above image (you may change the size according to your needs)
- 2 squares 15"x 15"
- 4 rectangles of 12"x 15"
- iron and fold all of these in half

iron and fold the long sides of the rectangles half an inch towards the wrong side
to create a false seem
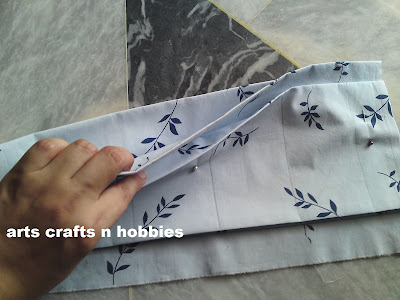
now sandwich the larger floded piece in between the 2 smaller folded rectagles in such a way that its about 2 inches higher then the base line and about 1 inch lower then the upper edge . Keep the open sides of the smaller rectangles at the lower side so that it will come at the base of the pockets .Pin and secuer this

now mark the lines of the pockets to be sewn i made 4 large pockets and two 1.5 inch narrow pockets at each end .Its all up to you you may decrease or increase the number of pockets you need ,just be care full that the pockets on the extermities should be narrow as they will come in the width of the bag use them for thin objects as pencils lipsticks, eye pencils, nail cutters e.t.c mark one side and the back side's pockets will be formed automatically ;)

now stitch along the marked lines and at the base of the smaller rectangle to seal the lower edge of the pockets .make the other side just the same way and sew them together from the sides and the base and leave the mouth open .
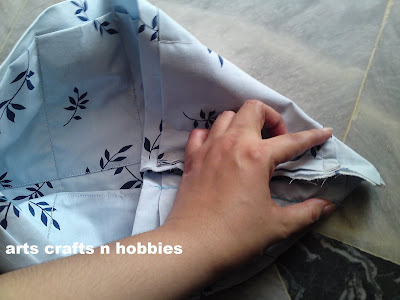
stuff your fingers in the corners and make a diagonal stitch between the fingers as shown above this is the distance that will cover the two narrow 1.5 inch pockets (total length covered 3 inches between the fingers)

sew and cut off the extra corner .

turn the inside out and you are all done ,good to stuff in !well what ever you want ,you name it and you will have a pocket for it :)
it took me only an hour to make this and i love it .ENJOY
linking to
Funky junk Interiorsmaking Monday marvelous market yourself mondaymotivate me mondayget your craft on linky partyThe inspiration board linky party{wow me} wednesday #8world wide blog hop #3share the love Wednesday linky partylinky party no#62 by tea rose homewhats up wednesdays link party_20




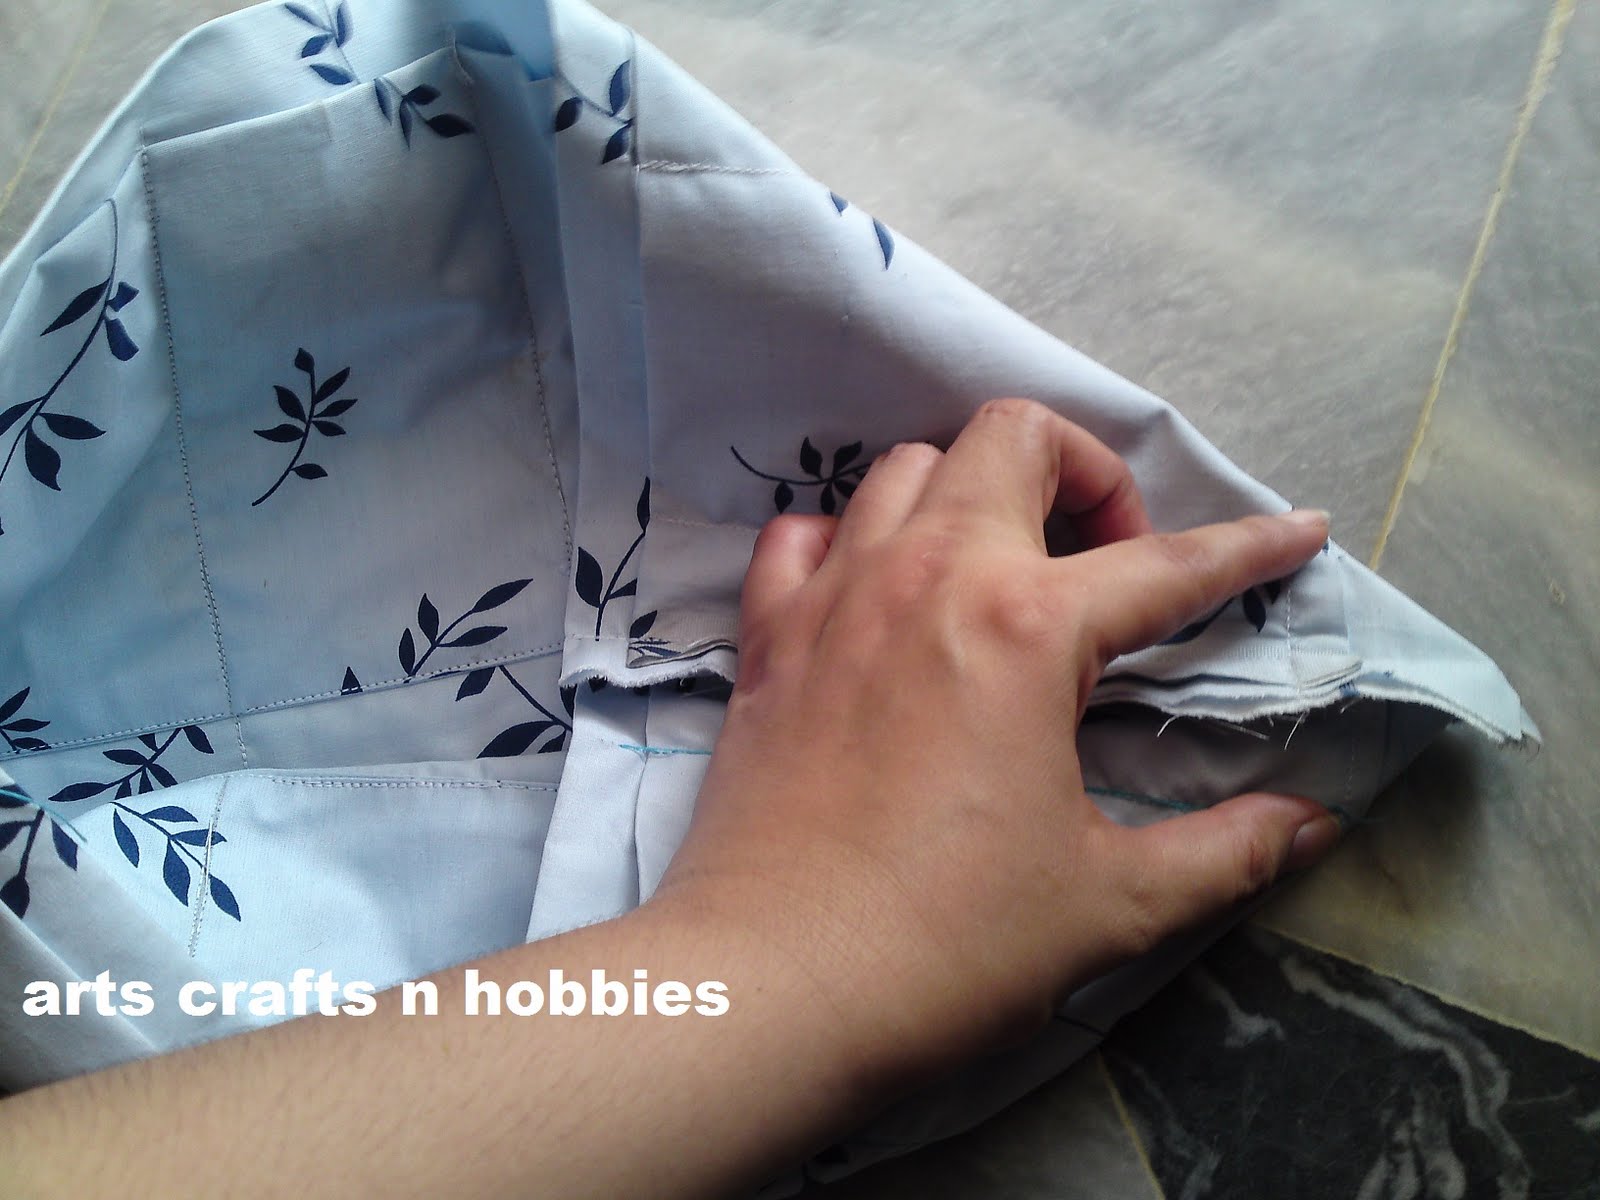
 sew and cut off the extra corner .


 I have used crystalline blue and purple color in the dress where as milky white in her skirt,handkerchief and in her face.The painting is outlined with golden lead,in the beginning i wanted to frame this painting but hubby suggested that it would look much better unframed if you place it on a wooden holder and frankly now i am quite happy with the result and i just love the way it creates a shadow on the wall behind it :) .Oh totally forgot to tell you that the wooden holder its placed on is hand crafted by my mother in law :) amazing isn't it ! yup she sure was a talented lady and this painting has so many memories related to her may her soul is blessed in heaven Amin .


