Friday, July 8, 2011

"Me" featured at Craftionary

hi friends today i have the honor of being the guest blogger at a very cute blog Craftionary owned by Hani a very organized and sweet lady .


please do check out :)

Wednesday, July 6, 2011

Chinese character in stain glass


Hi friends hows life ! today i wana share a stain glass painting with you all that i made some 8 years ago this is the first painting i have ever tried in glass painting and also the first painting i did after my marriage, my awsome mother inlaw was alive back then and she liked it alot ,mind you friends she was a great crafter her self excelent in stiching and knitting and really good in oil painting and wood crafting some day i will show you her creations ,a really nice person but its so sad that you loose great people like her so soon she died just after 1 and half year of my marriage! one of the reasons this painting is really dear to me is that it has so many memories related to her .


I saw this character on a miniature wooden decoration screen that belonged to my mother in law. I drew and enlarged the image free hand on a paper and then transferred it on the glass .


I have used crystalline blue and purple color in the dress where as milky white in her skirt,handkerchief and in her face.The painting is outlined with golden lead,in the beginning i wanted to frame this painting but hubby suggested that it would look much better unframed if you place it on a wooden holder and frankly now i am quite happy with the result and i just love the way it creates a shadow on the wall behind it :) .Oh totally forgot to tell you that the wooden holder its placed on is hand crafted by my mother in law :) amazing isn't it ! yup she sure was a talented lady and this painting has so many memories related to her may her soul is blessed in heaven Amin .

LINKING TO
strut your stuff
show of your stuff party
freaky Friday follow

Tuesday, June 28, 2011

Faux Fish globe


Hi friend today i want to show you my brand new" fish home".

Well what do you think about it :) a fish container that does not need to be cleaned on a regular basis and a fish that needs no feeding ,no care, can be left out for a long period of time and would never become sick or will die because of the bad care ....Hummm like the idea :) ?


OK enough beating about the bush lets come to business and tell you how its made ,well guys this is the great idea of Jane lake and i found it one day just by chance when i was randomly browsing the net i loved the idea soooo much that i just got to make this one i bought all the materials needed from a craft store but unfortunately couldn't find a small round fish bowl so i bought this large glass as my fish container.
Things you will need to make this project
  • water crystals (transparent balls)
  • plastic fish
  • coral or sea shells
  • A container
for the detailed instructions and tutorial click here


my sweet little jelly gold fish ,yup its not made up of plastic its made with the same water absorbing jelly like material from which water crystals are made ,now they are easily available in a large variety of colors and shapes originally they are quite tiny but when soaked in water they swell up almost double their original size.
You can actually see the round water crystals at the top near the brim of the glass !actually the catch behind this is that these transparent crystals disappear when submerged in water so the fish placed in them seems to be swimming in the water .


Linking to
nap time crafters friday favs party

linky party no.59

Wednesday, June 15, 2011

Excellent play dough recipe


Hi friends summer is" ON "and summer vacations have also started so every mother knows that the only refuge for her left is to keep the children busy in some nondestructive positive activity ,playing with play dough is one of them :) but the play doughs available in market are not only quite expensive here in Pakistan but the thing that bothers me most is that we don't know what its made from and what type of toxic colors are used in it and we happily spend our own hard earned money on buying this poison for our kids and let them play with it ,for the very reason i decided to experiment and make my own home made play dough with 100% non toxic ingredients and yesterday i finally succeeded in making an excellent play dough with the ingredients that are all ready present in every kitchen .
R U ready for my very own cheep play dough recipe :)

INGREDIENTS;
  • 1cup fine all purpose flour (with out self raising agent)
  • half cup fine rock salt
  • 1table spoon vegetable oil
  • 1 cup synthetic white vinegar
PROCEDURE;
  1. Thoroughly mix all the dry ingredients with your hands by rubbing them in your palms thus breaking any lumps (if present).
  2. In a cooking pan add the oil and vinegar to the dry mixture and mix well with a whisk.
  3. On low heat cook for 1 or 2 minutes and continuously stir until the dough is no more sticky to the sides of the pan and starts gathering in the center of the pan this is the sign that its ready, remove from heat and take it out of the pan.
  4. Let it cool down a bit when easy to handle(but still warm) kneed it on a clean hard surface .
  5. Add food colors of your choice.
  6. If the stinky smell of vinegar is bothering you just add 2 drops of vanilla essence! but i will recommend you not to add the essence as the bad smell of vinegar will reduce the urge in your children to eat and taste the dough :)
  7. Place in a air tight jar and if ever you feel that its getting dry with time or while playing under a ceiling fan then simply add a few drops of water to it and slightly kneed it and store back in the airtight container ,it will be good as new.

some miniature dough fruits my daughter present me as a gift for my effort :)

Tuesday, June 7, 2011

Pillow case dress Refashion tutorial


Hi friends how are you all ,today i will show you how to reshape a simple pillow case dress into a cute ruffly frock


Well the story starts from the day when i made a long pillow case dress for my elder daughter but she some how didnt like it a bit and totaly refused to wear it :(
so i asked her that can this be given to her younger sis and she gladly agreed now the dress was pretty long for the younger one so i decided to do some thing interesting with it thats how i cut it


remember that its a prepared dress with a back so i am showing you the cutting from the front and we aill automatically get the back parts


the shourlder ruffles pieces are trimmed to have a scalloped shape


The neck line is prepared by using a bias tape and shulder ruffels are attached to the body and the lower skirt is pleated and attached to the prepared body .


thats it all done now i just added a big ribbon bow in the center of the body


mommy makes me soooooo mad with her camera at me :)


Now thats better mood :)


the back


fun with sis and cousins :)


BUT! the story does not end hear now my elder dauter is also in love with the transformed look of previously" her" pillow case dress and wants it back :( but now its too short for her .......(KIDS) .......... ! any how the fight got resolved on my promise to her that i will make a dress just like this for her in her choice of fabric and every one is happy :)


LINKING TO
fireflies and jelly beans
strut your stuff linky party
the shabby chick cottage

Wednesday, May 25, 2011

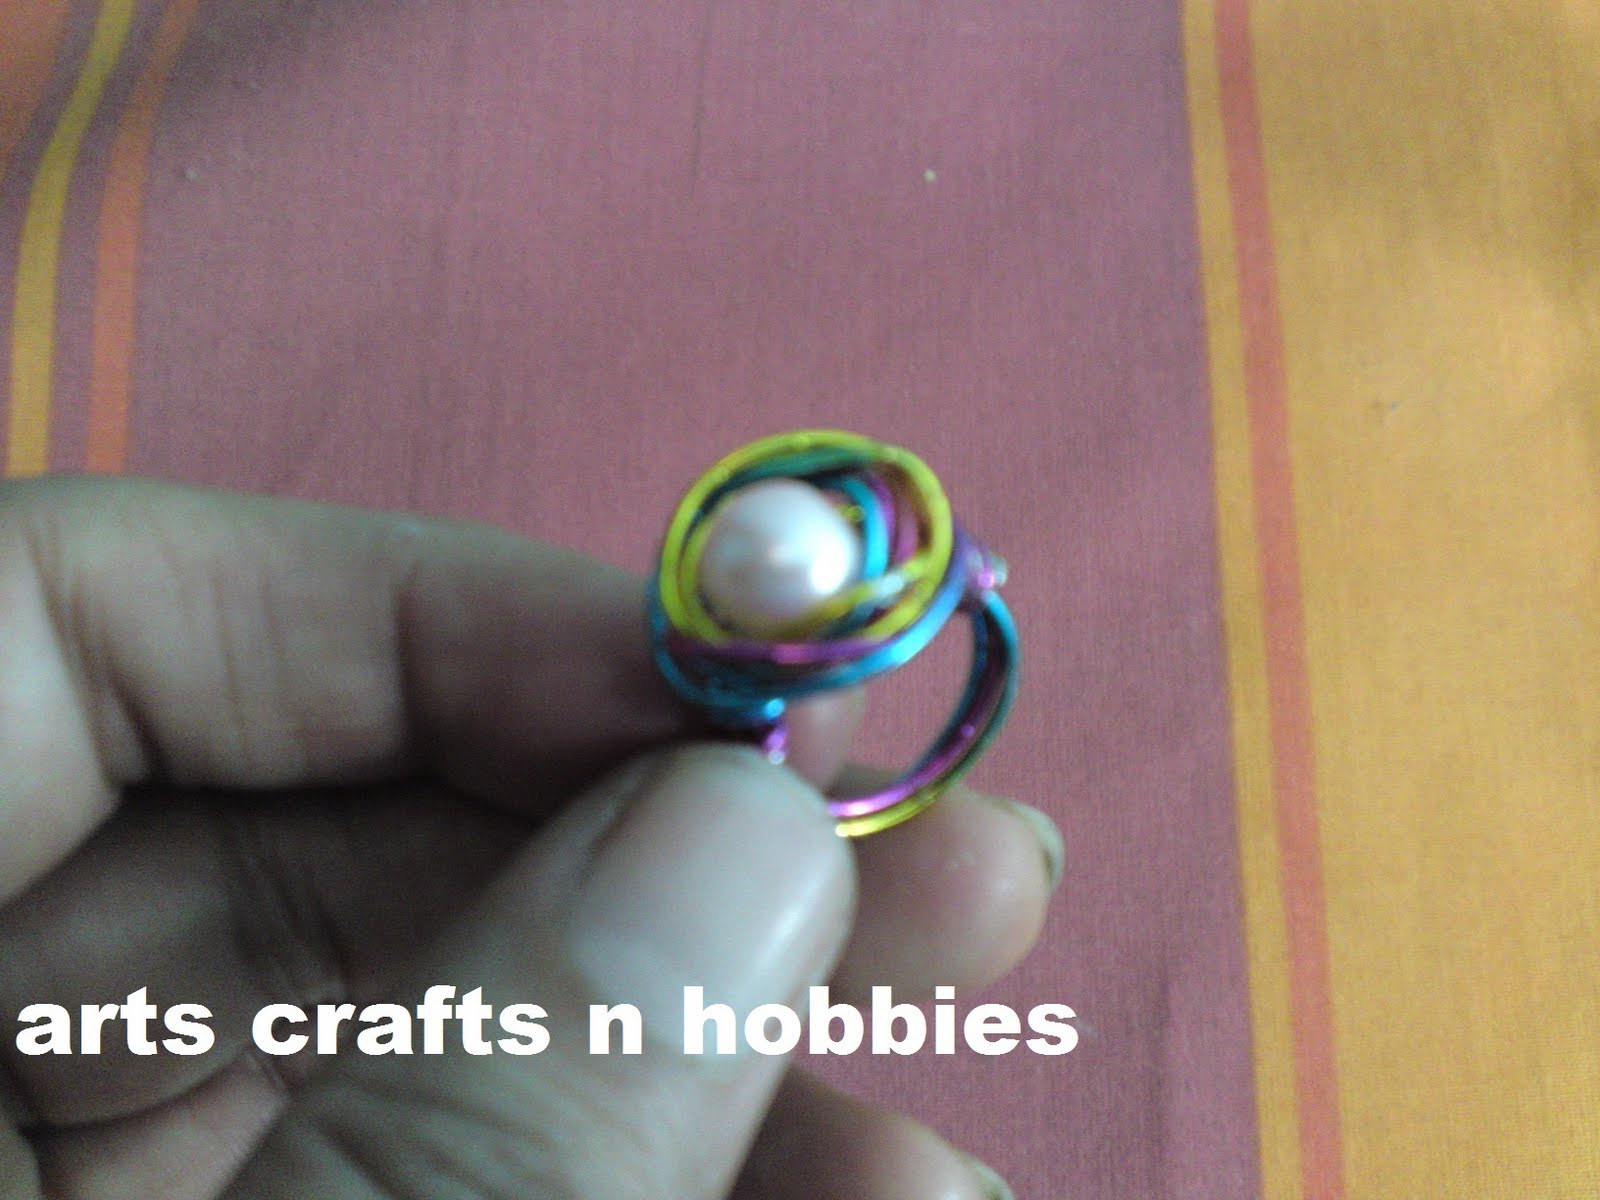
twisted rainbow wire rings


this is a random post about my first attempt on the wire jewelry .I found this rainbow colored wire in a craft store a few months back, at that time i had no project in my mind in which i can use these beauties. A few days ago my elder daughter wanted me to make finger rings for her and for her school friends ........... this was a difficult wish :( as i am not very good in jewelery making! I had to see a lot of videos on You-tube for this purpose and learned some basic techniques from there and then i remembered my rainbow wires.......... i was so overwhelmed with joy :)

and this is the final result .......

The most difficult of the procedure was to find a perfect cylinder shape to roll the wire on to get the perfect size for the tiny fingers ,luckily a ballpoint pen served the purpose :)


rainbow colors were perfect for the beautiful angel hands :)


I am not totally satisfied with this attempt of mine but my daughters are really happy to own their new rings :) and so long as they serve the purpose i am happy too ........ now i should be worried about my own fingers i have to twist and turn the wires for at least 8 more times to get 8 more rings for the school friends of my elder one :)

linking to :
show off your stuff party
strut your stuff

Wednesday, May 18, 2011

lace brooch tutorial


Good day friends how,s life i am really sorry for such a delayed post ,today i wana share the tute of this cute little brooch with you ,i had a little scrappy piece of a very beautiful lace with me , it was so little that i could not use it on any clothing yet it was so beautiful that i didn't want to throw it away then this idea popped into my mind that lets make a brooch out of it and thats how i made it!...........


The things you will be needing
  • scrappy piece of lace
  • artificial flowers ( i am using the flowers i won in a blog candy by Theresa :) )
  • stamens
  • safety pin
  • transparent glue
fold your lace in a cress cross manner like a fan and then tie and sew in the middle with the help of the needle and thread .


now bring together the two open sides and sew or glue them together ( i am using needle and thread)do the same to the lower end too.


and you will end up making a round flower like shape ,

now comes the fun part cut off the stems from the roses and stick them to the center of the lace flower arrange and stick the the stamens and then glue the whole thing on the safety pin. I am using plastic pin which has a large plastic surface to accommodate hand made stuff .


Once the glue was dried i also stitched the lace with the pin for a more durable bond.

hope you like it ,by the way if you dont have the patience and time to make one and interested to buy it then click hear of details .

linking to
linky party no 54
transformation Thursday

Sunday, May 1, 2011

My first peasant top attempt


Hi guys hows life as we all know that summer is slowly stepping in our lives hear in Pakistan and the sweet sweet spring is saying its goodbyes! over hear the spring was still coldish so the children used to wear the same type of all covered up cloths but now when summer is hear light and cute dresses are back , so i decided to make some tops and frocks for my girls this is one of the first one i made for this season and followed the tutorial from indie tutes what a fabulous site ,this was my first attempt to make a peasant top but i am totally in love with it and i know i will make a few more too very soon , for this shirt i made the pattern my self but if you want you may also download the pattern from prudent baby blog that has uploaded a free printable phasant top pattern along with a step by step tutorial ,have fun ladies and enjoy making cute dresses for your princesses :)


soooo busy is destroying a leaf :)


an unwilling model :)


You can notice a joint in the center of the top please dont get confused my fabric piece was a long strip and i wanted to make an A Line top so in order to increase the width i stitched two pieces together but if your fabric is wide enough then you will not have to do that .....


linking to
making the world cuter Monday
making Monday marvelous #53
craft-o-manic Monday linky party
motivate me Monday #68

LinkWithin

Related Posts with Thumbnails